
ACRE & Teamspeak
Bad Dudes uses the Advanced Combat Radio Environment 2(ACRE2) mod. ACRE2 adds realistic radio simulation to Arma 3 by replacing the Arma 3 VoIP with an external dependency on Teamspeak 3.
This allows for directional local speech, whispering, yelling, interactable radios, and radio terrain interference simulation.
Installing Teamspeak 3
- Download and install Teamspeak 3
- Close Teamspeak if it is running.
- Launch Arma 3 with the ACRE2 mod enabled.
If successful you will get a pop up indicating that ACRE2 has successfully installed the required Teamspeak plugins.
If, however, you get a pop up warning that the installation has failed you will have to try one of two alternate setup methods.
Alternate method 1 - Run as admin
If ACRE2 plugin installation fails, try running the launcher as administrator. This should give Arma the necessary permissions to install the plugins. You can run Arma normally after this process but will heave to repeat the process whenever ACRE2 updates.
- Navigate to your Arma installation directory (
<steam-install-directory>\steamapps\common\Arma 3) - Right-click
arma3launcher.exeand selectRun as administrator - Launch Arma with ACRE2 enabled under mods.
Alternate method 2 - Copy plugins manually
If neither of the above methods worked you will have to copy the plugins manually. This can commonly occur if you have Teamspeak in a non-standard location.
- Navigate to
<steam-install-directory>\steamapps\common\Arma 3\!Workshop\@ACRE2\plugin. Note that the!Workshopdirectory is a hidden folder and you may have to reveal hidden files and folders in Windows Explorer to locate it. - Select and copy the
acre2_win32.dllandacre2_win64.dllfiles. - Navigate to
%APPDATA%\TS3Client\pluginsand paste both plugin files.
Verifying installation
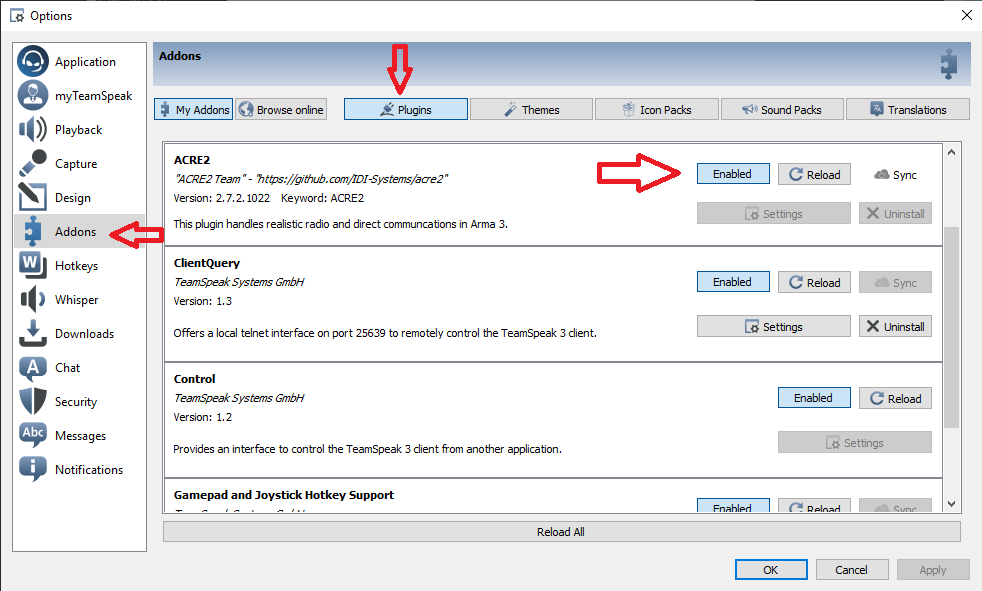
After following either of the above installation methods you should now verify that ACRE2 plugins are successfully installed and enabled in Teamspeak.
- Launch Teamspeak 3
- Select the
Toolsmenu at the top and then click onOptions - Select the
Addonstab on the left hand side. - Select the
Pluginstab on the top. - Verify that the entry for ACRE2 is present and is Enabled.
Connecting to the server
The next step is to connect to the server and verify that the server correctly reports your ACRE status.
- Open the
Connectionsmenu at the top left. - Click on
Connect - Enter
oronar.netin the server address field. - Enter a nickname in the nickname field.
- Click the
Connectbutton. - Click on your nickname in the server list and verify that you have an ACRE2 status in the right panel.
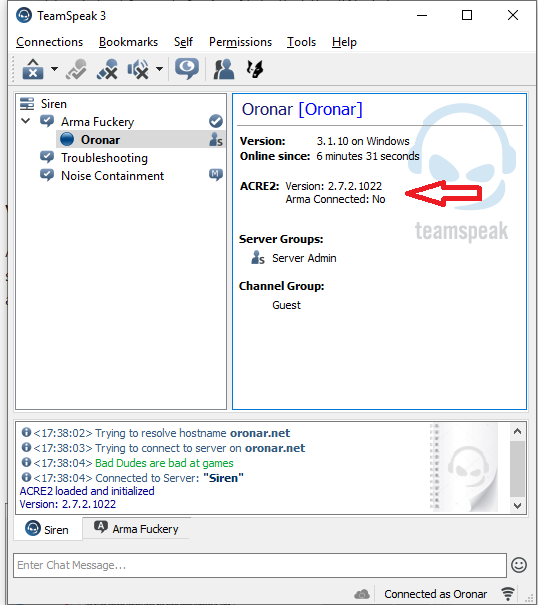
You should be able to see your ACRE version, 2.7.2.1022 at the time of writing this guide. You will also see an Arma Connected status. This indicates when you or someone else is in an active Arma mission and can no longer hear anyone on the server who is not also in the mission.